The sensitive side of the Lego Mindstorm NXT
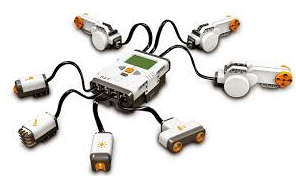
RobotMagic supports all popular Lego Mindstorm NXT sensors and peripherals- both in its simulator and in real life.
RobotMagic gives you 3 options to make your projects more interactive:
1: React to Sensor Events
To quickly get started with sensors use these blocks from the "Basic" library to react to sensor events, a sample file is here. The NXT can sense these events:
 | Button Pressed: Use to trigger actions when one of the NXT's buttons is pressed. You can select which button to react to by clicking on it- it will be colored red. When running in the simulator press the left/right arrow keys or the enter key. |
| Touch Sensor Pressed: Use to trigger actions when the touch sensor on Port 1 is pressed. Select which port the sensor is on using the drop-down menu. In the simulator setup your sensor with "World" blocks and press the number key corresponding to the sensors port, ie: "1" to trigger the touch sensor on port 1 |
| Sound on Microphone: Use to trigger actions when the microphone sensor on Port 2 reads a volume above 55. Select which port the sensor is on using the drop-down menu and choose between '>' for greater than and '<' for less than by clicking on it. Drag the bottom selector to choose the value. |
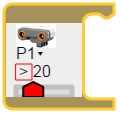
| Ultrasound Proximity: Use to trigger actions when the ultrasound sensor on Port 1 reads a distance above 20cm. Select which port the sensor is on using the drop-down menu and choose between '>' for greater than and '<' for less than by clicking on it. Drag the bottom selector to choose the value. In the simulator setup your sensor with "World" blocks to have your simulated robot sense simulated objects and other robots. |
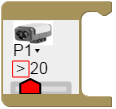
| Light Levels: Use to trigger actions when the light sensor on Port 1 reads a light level above 20. Select which port the sensor is on using the drop-down menu and choose between '>' for greater than and '<' for less than by clicking on it. Drag the bottom selector to choose the value. In the simulator setup your sensor with "World" blocks to have your simulated robot sense simulated objects and other |
2: Display and Graph Sensor Values
This program uses the "serialBegin" and "serialPrint" blocks from the "Debug" library to print the ultrasound sensor reading to RobotMagic's built-in console for display and graphing while the robot moves 10mm closer to a red cube.
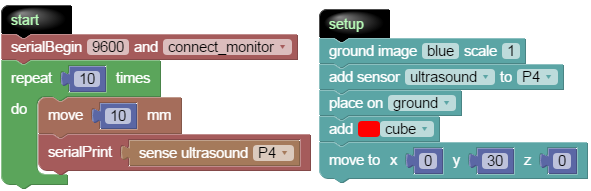
The simulator shows the robot moving to the cube and the sensor's simulated beam while it's active:
With the "serialBegin" block is set to "connect_monitor", the monitor shows the following values:
19
18
17
16
15
14
13
12
11
10
With the "serialBegin" block is set to "connect_graph", the graph displays as follows:
You can also print text and numbers to the NXT's screen (both simulated and real) using the "print" and "printNumber" blocks:
This program prints "Hello World" at x=0,y=8 and the ultrasound's reading to the bottom left corner.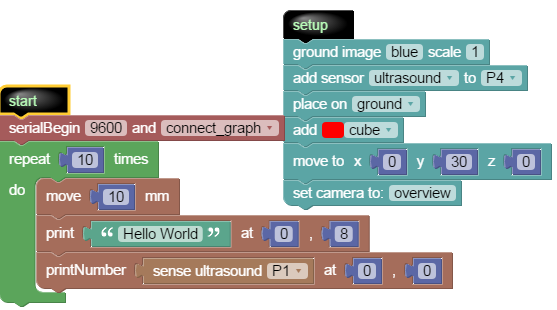
3: Assign Sensor Values to a Variable
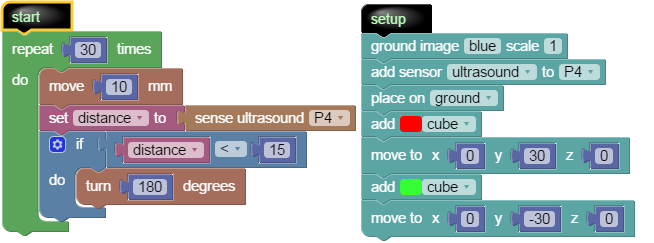
In this program we assign the proximity sensor's value to the "distance" variable and turn the robot when distance is less than 15. This causes the robot to bounce between the red and green cubes.
Start Creating with RobotMagic here: http://robotmagic.org